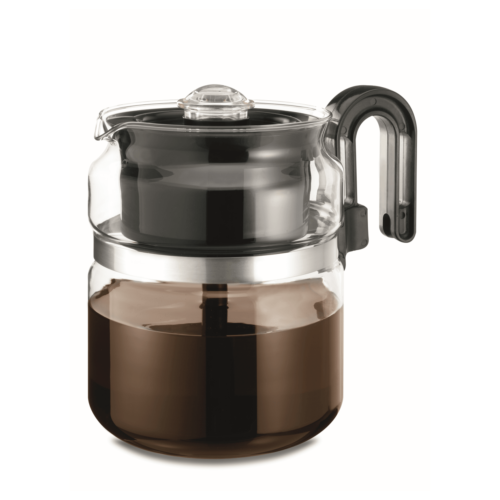
 Coffee Percolator, 8 Cup Glass Stovetop Percolator (#PK008)

13 Nov How to Clean a Coffee Maker
Coffee makers rank among the most neglected kitchen appliances. Many people use these products every day (and sometimes multiple times per day), yet they often go uncleaned for extended periods of time. Beyond hygiene issues, dirty coffee makers also fail to showcase the bean’s full flavor, eventually producing a brew that tastes like dirty dishwater.
Luckily, cleaning this common kitchen appliance is quite easy. Here’s a step-by-step guide you can use to clean standard drip coffee makers, pour-over systems, and more.
1. Dump the Grounds Shortly After Brewing
Each time you brew a pot of coffee, it’s important to dump the used grounds shortly after the process is complete. While you don’t have to dispose of them immediately, you should avoid leaving them in the machine for more than an hour. If you do, the oils from the coffee grounds could begin to damage your system, reducing its efficiency and paving the way for a total breakdown. Additionally, leftover materials could cause mold to grow inside the machine.
2. Wash the Removable Components Regularly
Even if you dump your used coffee grounds in a timely manner, oils from the beans will eventually build up. This is an inevitable result of brewing coffee, as the beverage is primarily composed of these oils (and other components) that are extracted from the beans. Over time, these oils can collect and form a brownish-black grime.
Once these oils build up, they diminish the flavor of your coffee. If you leave your machine unwashed for an extended period of time, your beverage will begin to taste rancid. However, even a slight buildup of oil can subdue the flavorful nuances of high-end beans.
To keep oils from collecting, wash your coffee maker’s removable components with warm water and soap regularly. You can also place these parts in the dishwasher; however, some may only be suitable for the top rack.
3. Decalcify the Coffee Maker as Necessary
In addition to oils from the coffee beans, minerals from your water will also build up in your coffee maker over time. Unfortunately, soap and water aren’t effective at removing mineral deposits. Instead, you’ll need to decalcify your machine.
Luckily, the decalcification process is very simple. Just follow these easy steps:
- Create a mixture of equal parts water and white vinegar.
- Run a brew cycle with this mixture (and no coffee).
- Let the brewed liquid sit for one hour.
- Dump out your coffee machine.
- Run a brew cycle with water only to rinse the machine.
You should try to decalcify your appliance at least once a month. However, if you have hard water, you may need to do it more often.
Enhance Your Coffee Drinking Experience by Keeping Your Machine Clean
When you brew your morning cup of coffee, you want to sip on a beverage that tastes great. Therefore, you need to keep your machine clean and working as efficiently as possible.
For more information about how to clean your coffee maker, contact Café Brew today!

Sorry, the comment form is closed at this time.